
Set up TravelSIMSY in minutes
One travel eSIM for every trip. No roaming charges, pay only for what you use, with coverage in 140+ countries. Follow these steps to get connected.
- Step 1
Download the app
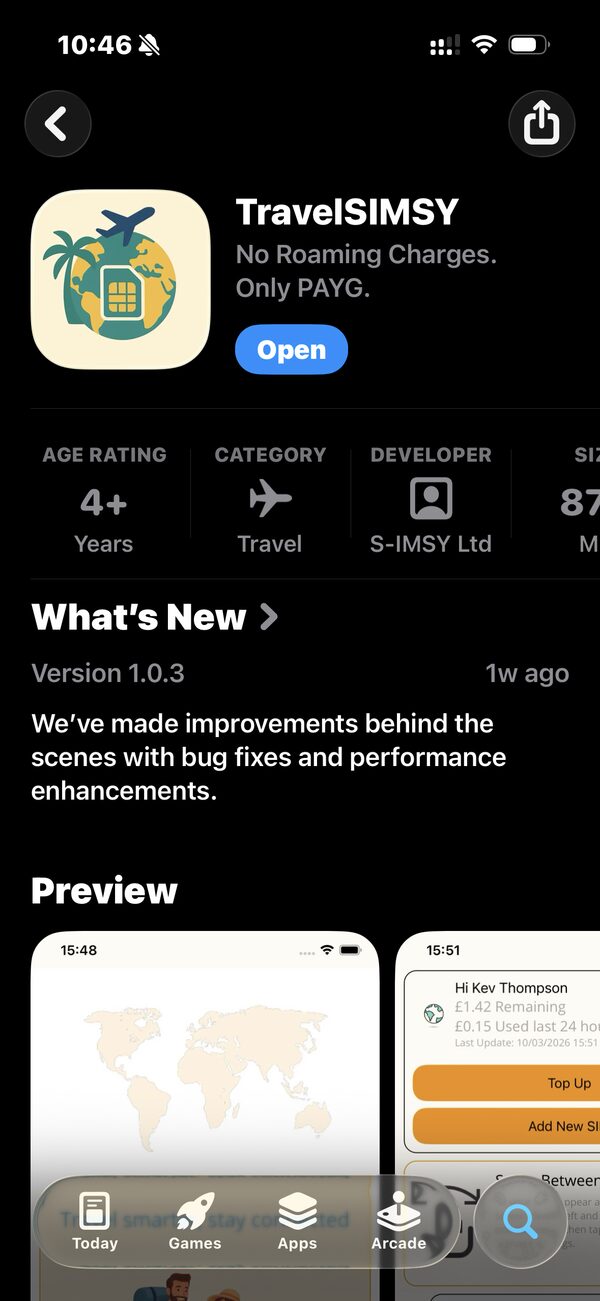
Search for TravelSIMSY in the App Store or Google Play and install it. The app is free, rated for ages 4 and up, and published by SIMSY Ltd. Once installed, tap Open to get started.
- Step 2
See what TravelSIMSY does
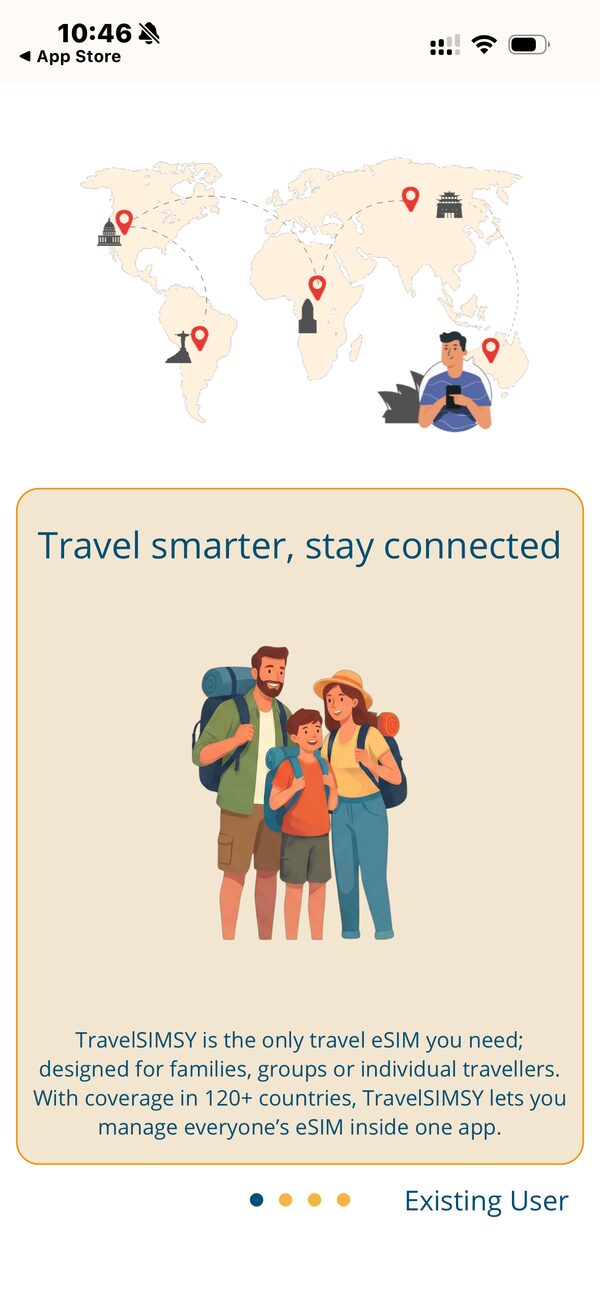
When you first open the app you'll see a quick welcome. TravelSIMSY is one travel eSIM for families, groups or solo travellers, with coverage in 140+ countries and no roaming charges — you only pay for what you use. If you already have an account, tap Existing User to skip ahead.
- Step 3
Choose your destination
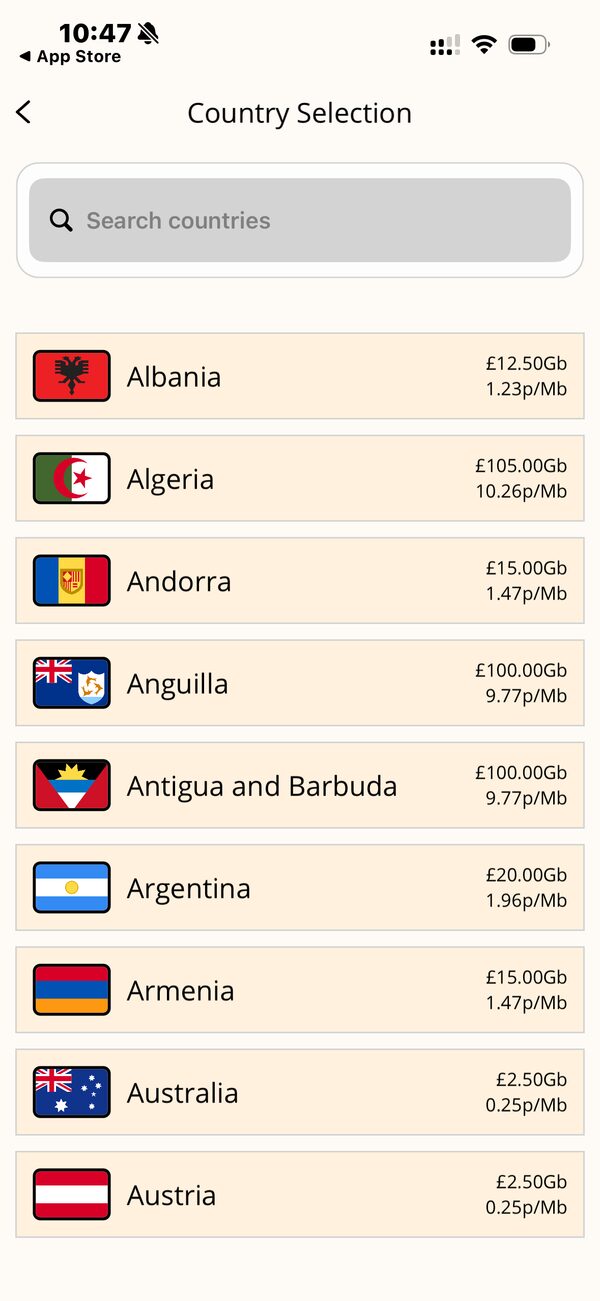
Search for the country you're travelling to, or scroll the list. Each country shows the data rate so you can see the price before you commit. Tap a country to select it.
- Step 4
Add more countries if you need to
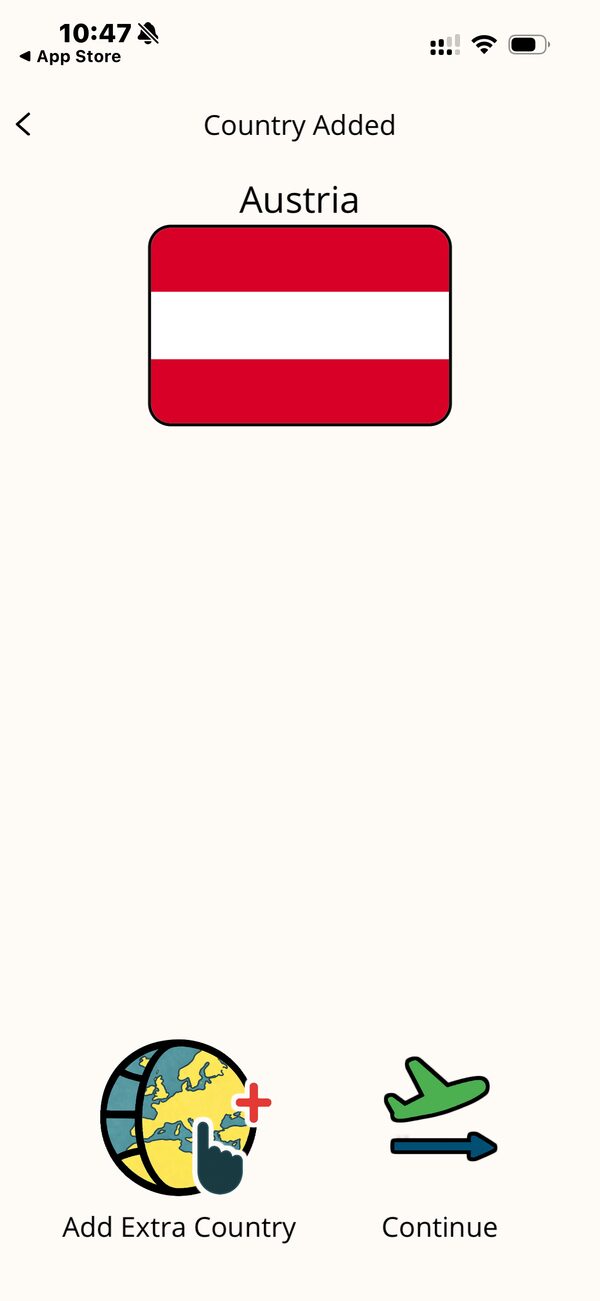
Once a country is added you can tap Add Extra Country to cover a multi-stop trip on the same eSIM, or tap Continue when you're done.
- Step 5
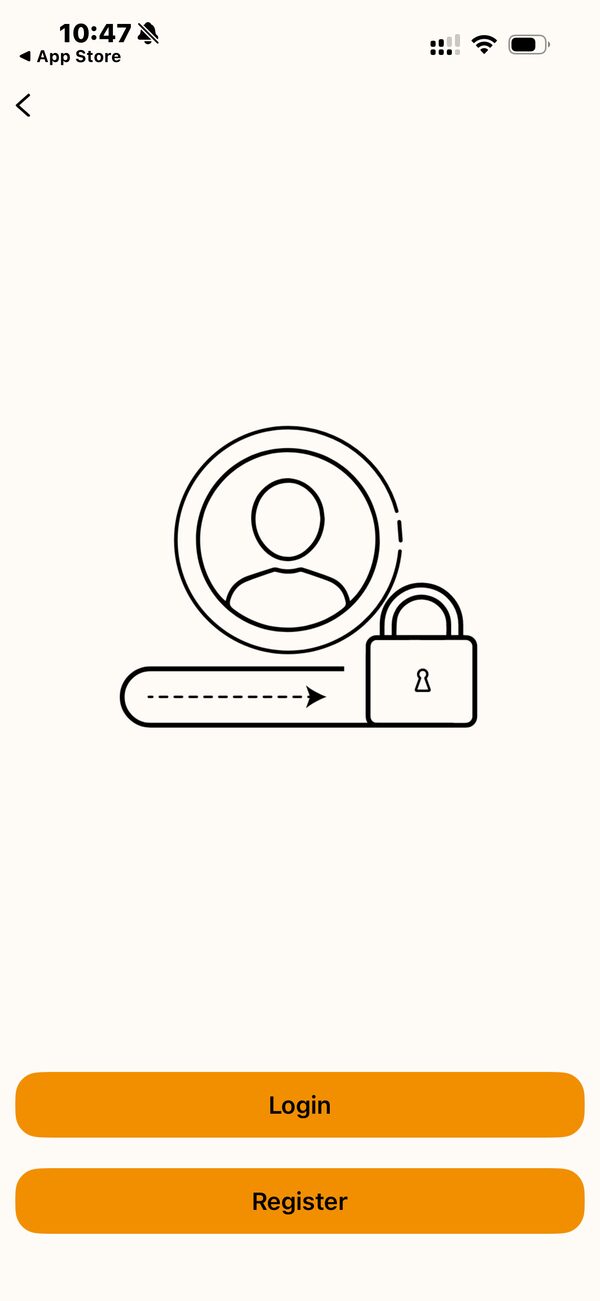
Create your account or log in
Tap Register to set up a new account, or Login if you've used TravelSIMSY before. Your account keeps your eSIMs and balance safe across devices.
- Step 6
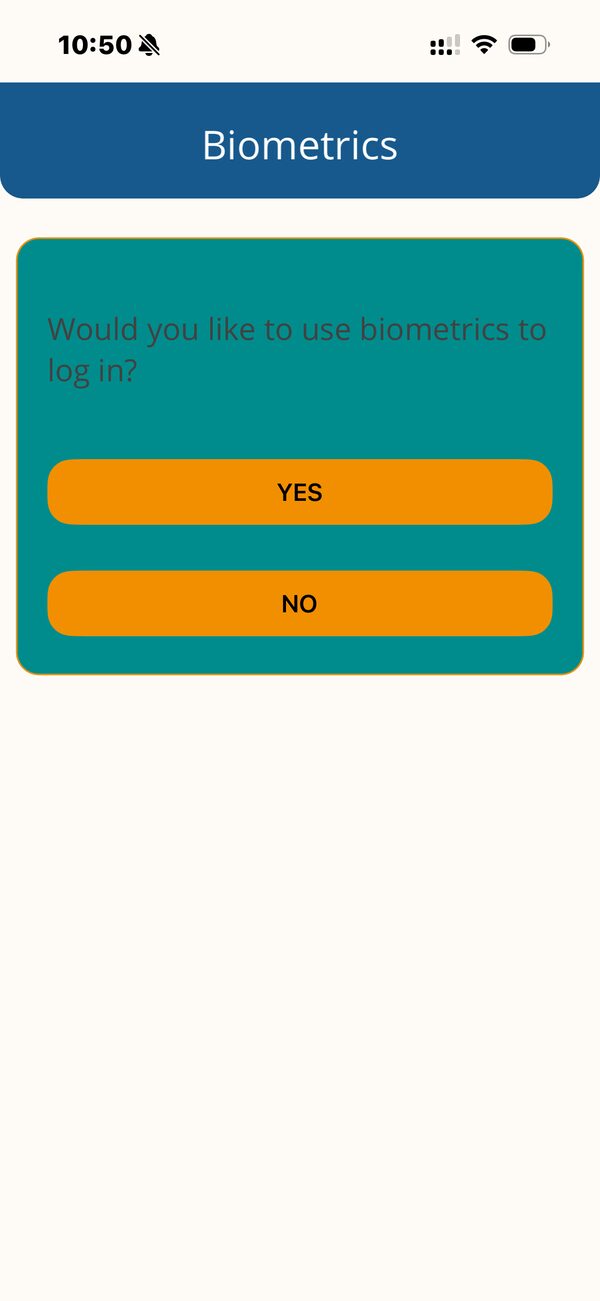
Turn on biometric login
Choose whether to use Face ID or fingerprint to sign in. Tap Yes for faster, secure access next time, or No to log in with your details each time. You can change this later.
- Step 7
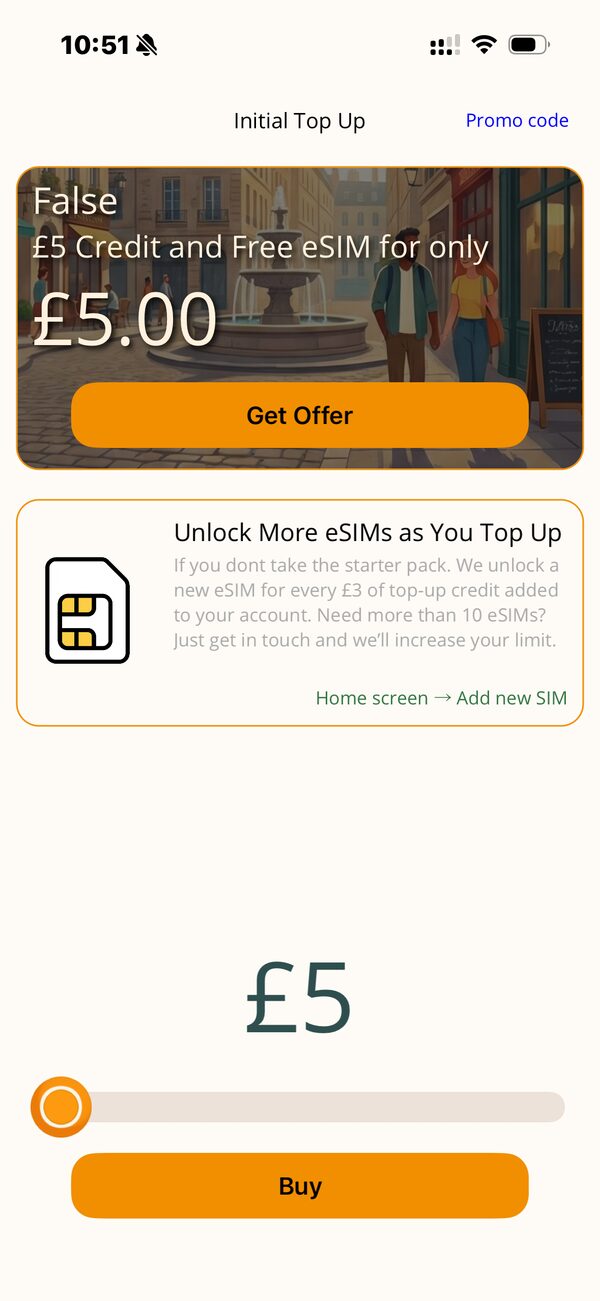
Add your starter credit
Add your initial top-up to activate your eSIM. The starter offer gives you credit plus a free eSIM. Use the slider to set your amount, then tap Buy. Have a promo code? Tap Promo code at the top right.
- Step 8
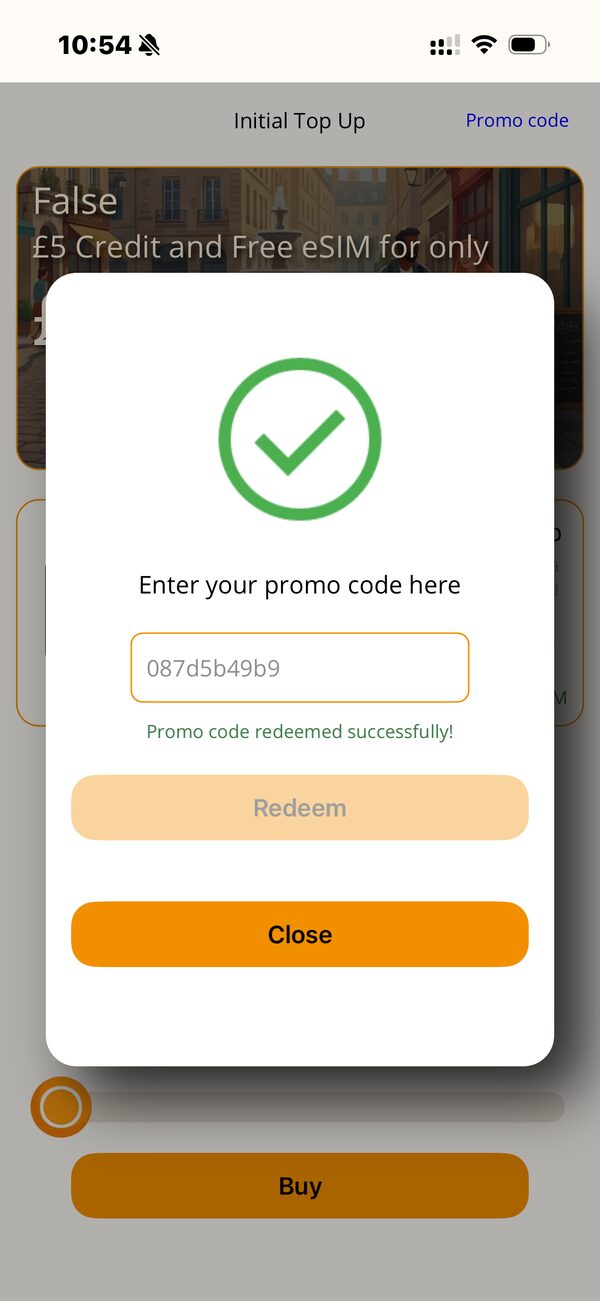
Redeem a promo code
If you have a promo code, type it into the box and tap Redeem. You'll see a confirmation when it's been applied, then tap Close to carry on.
- Step 9
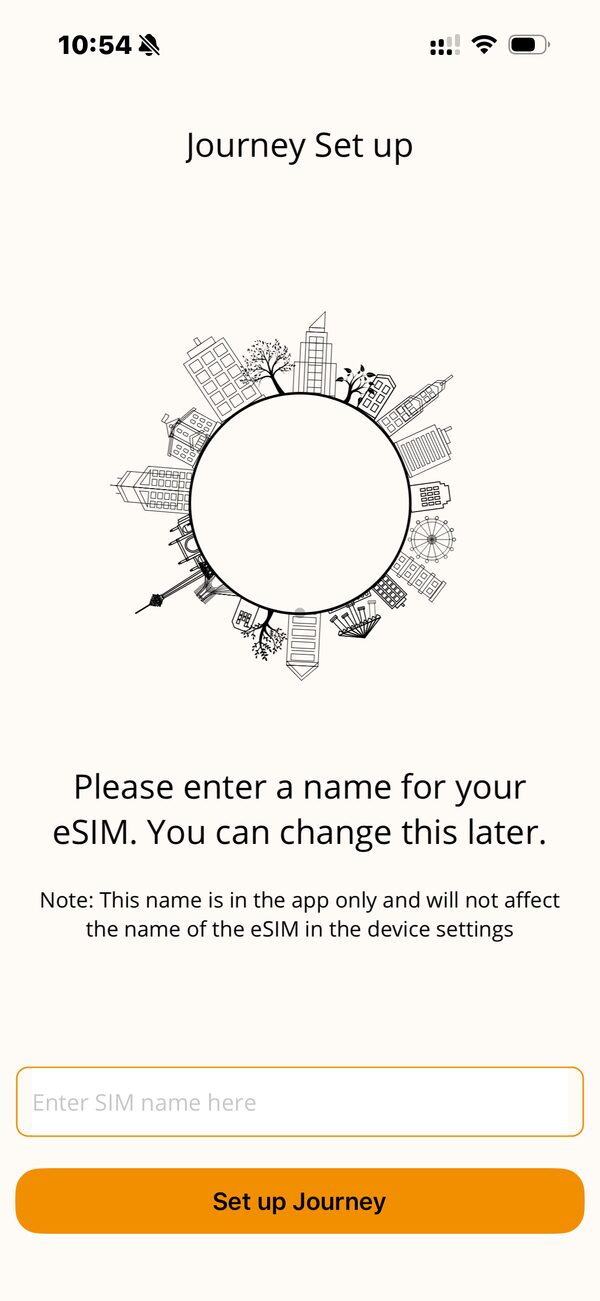
Name your eSIM
Give your eSIM a name so it's easy to recognise — for example the trip or traveller it belongs to. This name only appears in the app and doesn't change anything in your device settings. Tap Set up Journey.
- Step 10
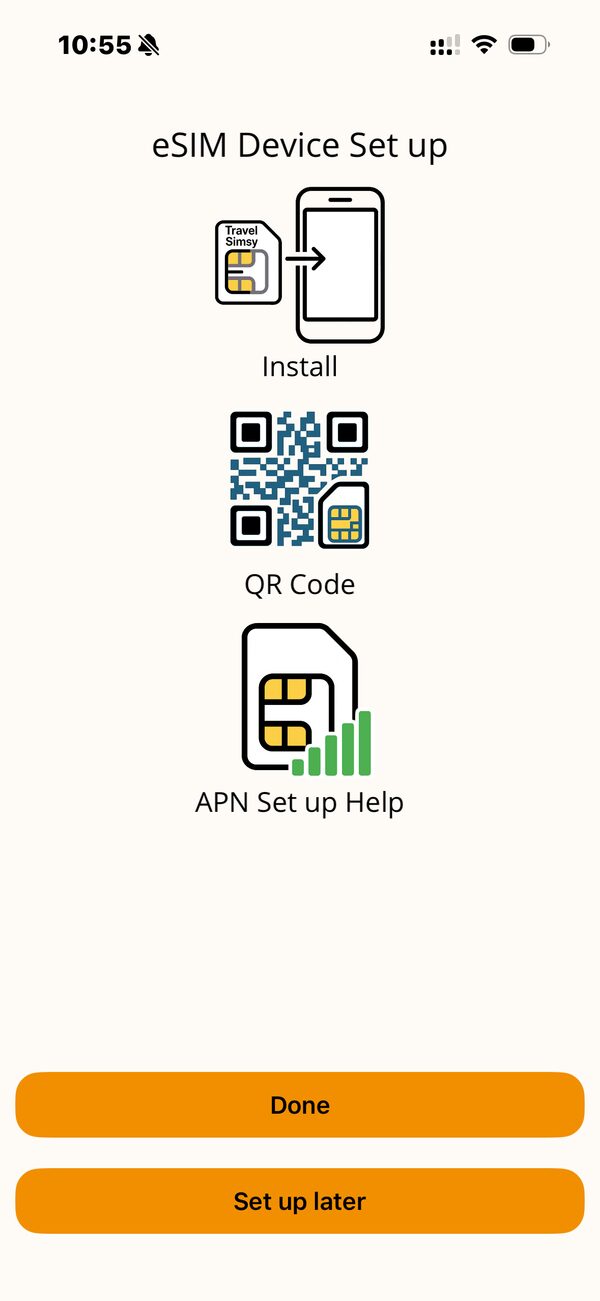
Install the eSIM on your device
Tap Install to add the eSIM straight to your phone, or scan the QR Code on another device. If you need to adjust network settings, tap APN Set up Help. When you're finished, tap Done, or choose Set up later to come back to it.
- Step 11
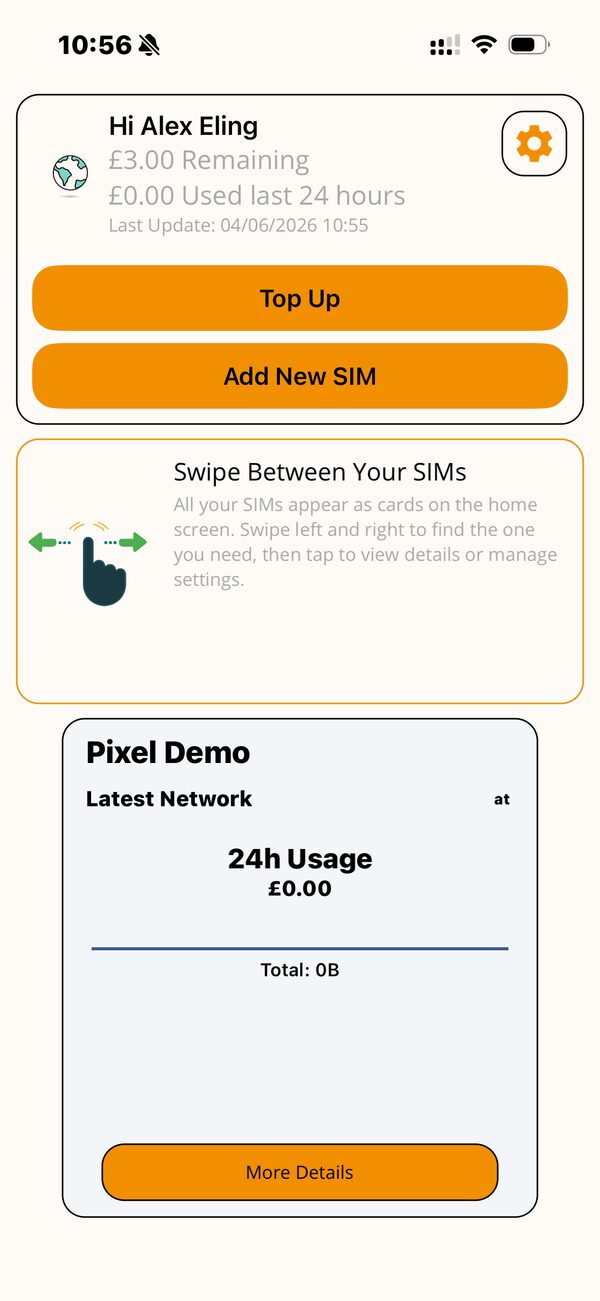
You’re connected
Your home screen shows your balance, recent usage and live network. Tap Top Up to add credit, Add New SIM for another trip, and swipe left or right to move between your eSIMs. That's it — you're ready to travel.
Ready to travel smarter?
Download TravelSIMSY and set up your first eSIM today.
Screens shown are from the iOS app and may vary by device.